
DIY Shea Butter Face Moisturizer for Dry & Aging Skin is the one thing that rescued my winter-tired cheeks last year. If your skin feels tight by noon, fine lines pop louder than your coffee maker, and store-bought creams barely help, this easy little recipe will feel like a hug. I keep a tiny jar on my bathroom shelf and it still makes me smile every night. It smells cozy, melts like satin, and you can whip it up in a single bowl. Ready to make something that actually nourishes and feels fancy without the price tag? Let’s do it.
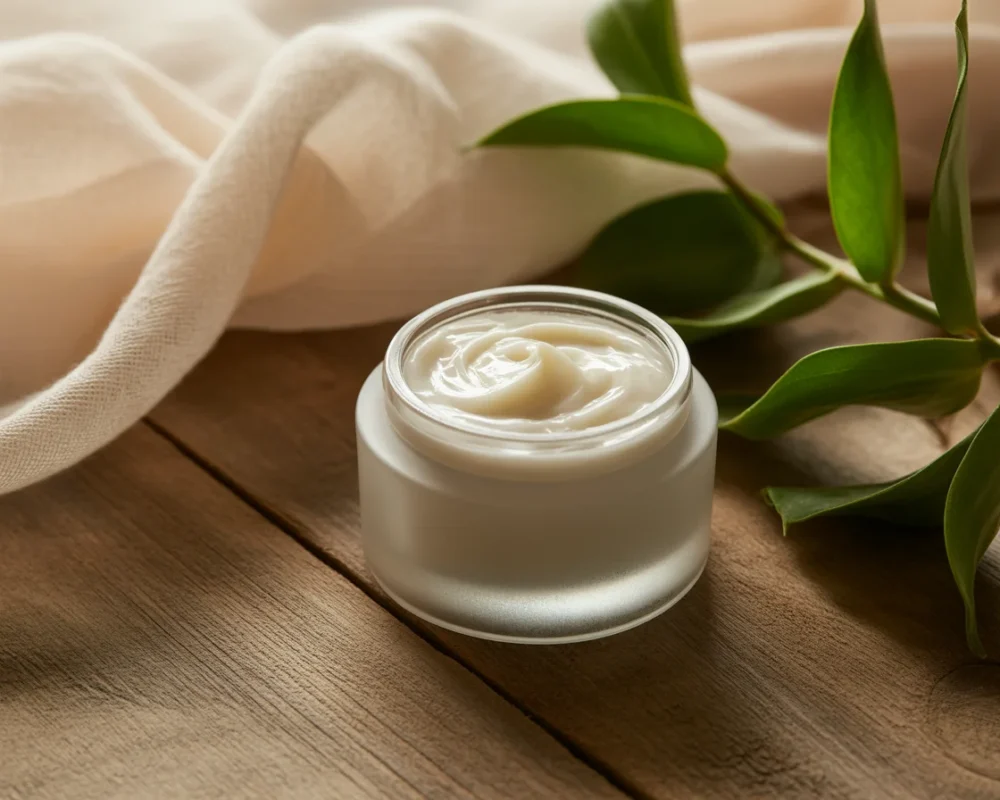
Table of Contents
What is Shea Butter?
Shea butter is a creamy fat pressed from the nuts of the shea tree, a beautiful tree that grows across parts of West Africa. In its unrefined form, it’s pale ivory with a soft, nutty scent and a rich, dense texture. Think of it like butter for your face, but lighter than it sounds once melted into the skin.
Unrefined shea retains more of its natural goodies like vitamins A and E, plus skin-loving fatty acids. Refined shea is more neutral in scent and color, but it can be a little less potent. I reach for high-quality unrefined shea when I want every drop of nourishment. For a mild smell, refined is fine too.
Unrefined vs. Refined
Unrefined shea is usually richer, slightly nutty, and closer to its natural state. It feels a bit creamier. Refined shea is filtered and deodorized, which can make it smoother and more universal for sensitive noses. For this recipe, both work. If you’re making it as a gift, refined shea pairs nicely with essential oils because there’s less competing scent.
How to Store
Keep shea butter in a cool, dry place away from direct sunlight. If your home runs warm, store your jar in a drawer. Shea can sometimes get grainy if it melts and cools slowly, which is why we’ll whip and chill it strategically. The texture should end up velvety and scoopable.
By the way, when friends ask how I keep my skin calm on long travel days, I always send them my favorite tutorial and tell them to Create Your Own DIY Shea Butter Face Moisturizer for Dry & Aging Skin at home. It’s simple, and it works without fuss.
Benefits of Shea Butter
Here’s why shea butter is such a star for dry and aging skin. It’s naturally rich in fatty acids that soften and protect, and it sinks in slowly so it’s perfect at night. Shea supports the skin barrier, which is your face’s security system against dryness and irritation. It can help your other skincare layers work better by holding in hydration.
It’s also soothing. If your skin gets red and cranky when the weather turns cold or windy, a thin layer of shea calms things down. The vitamins A and E are like tiny cheerleaders for skin repair. And while everyone’s different, many people find shea gentle even on sensitive skin.
“I tried this recipe after months of flaking on my cheeks. One week in and my makeup stopped clinging to dry patches. I love the glow without the greasy feel.”
Some folks worry about clogged pores. On most rating scales, shea butter is low to moderate for comedogenicity and many people use it without breakouts. If you’re acne-prone, use less and layer it over a hydrating serum, focusing on drier areas first. Patch test on your jawline to play it safe.
There’s a kind of confidence that comes with soft, happy skin. It’s not magic, but it sure feels good. That’s why I always keep a little jar and remind myself you can Create Your Own DIY Shea Butter Face Moisturizer for Dry & Aging Skin in under 20 minutes.
Essential Tools and Ingredients for Shea Butter Face Cream Recipe
You won’t need fancy equipment. Most of this lives in a regular kitchen, and the key is keeping everything clean and completely dry before you start. Moisture can shorten the shelf life of oil-only recipes, so treat your tools like you’re prepping a mini skincare lab. If you enjoy simple, nourishing DIY face creams, you may also like this DIY almond oil face cream for glowing skin, which is another great option when you want a soft, radiant finish with lightweight comfort.
Tools: heatproof bowl, small saucepan for a double boiler, silicone spatula, hand mixer or whisk, clean 4-ounce glass jar with lid, kitchen scale or measuring spoons.
- Main ingredients:
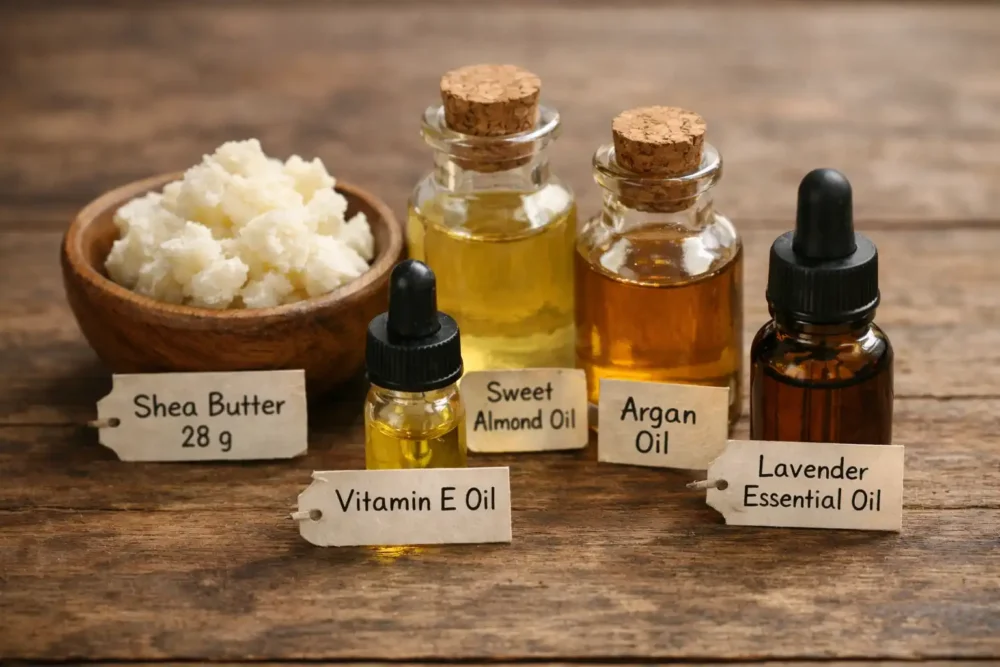
- 2 tablespoons unrefined shea butter (about 28 g)
- 1 tablespoon sweet almond oil, jojoba oil, or grapeseed oil (about 14 g)
- 1 teaspoon argan oil or rosehip oil for extra nourishment (optional)
- 3 to 4 drops vitamin E oil for freshness and skin support
- 3 to 6 drops essential oil like lavender or frankincense (optional, skip if sensitive)
- Why these work: shea is the base for cushiony moisture, jojoba mimics skin’s natural oils, rosehip or argan adds a little bounce and glow, and vitamin E helps slow oxidation.
Keep it anhydrous, which is a fancy way of saying oil-only. If you add water or aloe, you’ll need an emulsifier and a broad-spectrum preservative. For simplicity and safety, this recipe avoids water so you can store it for several months when kept cool and clean.
If you’re gifting, label the jar with the date and the phrase Create Your Own DIY Shea Butter Face Moisturizer for Dry & Aging Skin so they know what it is and how special it is. Also remind your lucky person to patch test.
How to Make Shea Butter Lotion: Step-By-Step Instructions
Before You Start
Wash and dry your tools. Wipe your bowl and spatula with a little rubbing alcohol if you want extra cleanliness. Set your jar nearby so you can fill it while the mixture is soft. Have a spot in the fridge cleared if your kitchen runs warm.
Step-by-Step
- Melt gently. Place the shea butter in a heatproof bowl. Set the bowl over a small saucepan with a couple inches of simmering water. Stir just until most of the shea looks glossy and soft with a few small pieces still visible. Pull it off the heat to prevent overheating.
- Add carrier oils. While the shea is warm, stir in your jojoba or almond oil, plus the optional argan or rosehip. Keep stirring until everything looks uniform and smooth.
- Quick chill. Pop the bowl into the fridge for 10 to 15 minutes. You’re aiming for edges that look cloudy and thick with a soft center. If it fully hardens, let it sit at room temp for a few minutes.
- Whip for fluff. Use a hand mixer or whisk and beat for 1 to 2 minutes until the mixture turns pale and creamy, like whipped frosting. This step improves spreadability and helps prevent a grainy finish.
- Finish with extras. Add vitamin E and, if using, a few drops of essential oil. Whip briefly to combine. Avoid more than 6 drops total for a face product, and skip essential oils entirely if you’re sensitive.
- Jar it. Spoon the cloud-like cream into your clean jar. Smooth the top and label with the date. Let it rest at room temperature until set. If your home is hot, store the jar in a cool cabinet.
If you’ve ever creamed butter and sugar for cookies, this will feel familiar. You’re not cooking, just softening, chilling, and whipping. The result is a silky balm that melts on contact. Every time I make a batch, I remember the first night I tried it and woke up with calm, bouncy skin. That was the moment I decided to Create Your Own DIY Shea Butter Face Moisturizer for Dry & Aging Skin would be a permanent part of my routine.
Best Practices for Applying Shea Butter Face Cream
Use your shea moisturizer as the final step in your nighttime routine. It seals in hydration from lighter layers like toner and serum, and it’s especially comforting when your skin feels dry, tight, or weather-stressed. If your skin prefers a softer, more calming feel on sensitive nights, this lavender and chamomile face moisturizer is another gentle option that pairs beautifully with a slow, soothing bedtime routine.
- Start small. A pea-sized amount is plenty for the whole face.
- Warm it between your fingertips, then press into damp skin.
- Layer smart. Hydrating serum first, then shea moisturizer, then SPF in the daytime.
- Target zones. Apply more on cheeks, less on the T-zone if you’re combination.
- Be consistent. Use nightly for 2 weeks to see steady results in texture and softness.
- For makeup days, wait a few minutes before foundation to reduce pilling.
If you live in a humid climate, use less or apply only at night. In a dry climate, this can be your skin’s best friend. Try it as an eye balm too, tapping gently along the orbital bone. And don’t forget your neck and hands when there’s extra on your fingertips.
One more tip for skin that gets flaky: layer a hydrating mist or a few drops of hyaluronic serum under your moisturizer. Shea locks it in so the glow lasts. This is also a kind way to introduce richer textures if your skin is new to them.
Common Questions
Will this clog my pores?
Most people do fine with shea butter, especially when used sparingly. If you’re acne-prone, use a lighter oil like grapeseed in the formula and apply a tiny amount over damp skin.
Can I add water or aloe?
Not to this simple recipe. Water needs an emulsifier and a broad-spectrum preservative. Keep it oil-only for safety and longer shelf life.
How long does it last?
About 3 to 6 months when stored cool and clean. Use clean fingers or a small spatula to avoid contamination. If it smells off or changes color, make a fresh batch.
What if it turns grainy?
Graininess comes from slow cooling. Next time, chill the mixture briefly after melting, then whip. Grainy texture still works, it just feels a bit bumpy before melting on skin.
Can I use essential oils?
Optional. Stick to 3 to 6 drops total per 4 ounces for facial use. Patch test on your inner arm first, and skip if you’re sensitive or pregnant unless your doctor approves.
A Cozy Skin-Loving Wrap-Up
This little jar of comfort is simple, affordable, and customizable. You can Create Your Own DIY Shea Butter Face Moisturizer for Dry & Aging Skin in minutes and give your skin that soft, nourished feel we all want. Keep the recipe oil-only, whip it for a dreamy texture, and use just a pea-sized amount. I hope it becomes your go-to on chilly nights or whenever your skin needs a hug.
Tag me when you Create Your Own DIY Shea Butter Face Moisturizer for Dry & Aging Skin at home. I love seeing your variations and hearing how your skin feels. You’ve got this, and your glow will be worth it.
If you love simple DIY skincare like this, find even more natural beauty recipes, self-care ideas, and cozy routines by following me on Pinterest at pinterest.com/glownour1.
Shea Butter Face Cream
Materials
Main Ingredients
- 2 tablespoons unrefined shea butter About 28 g, provides the base moisture.
- 1 tablespoon sweet almond oil, jojoba oil, or grapeseed oil About 14 g, acts as carrier oil.
- 1 teaspoon argan oil or rosehip oil Optional for extra nourishment.
- 3-4 drops vitamin E oil For freshness and skin support.
- 3-6 drops essential oil (like lavender or frankincense) Optional, skip if sensitive.
Instructions
Preparation
- Wash and dry your tools. Clean your bowl and spatula with rubbing alcohol for extra cleanliness.
- Set your jar nearby for filling while the mixture is soft. Clear a spot in the fridge if your kitchen is warm.
Making the Cream
- Melt shea butter by placing it in a heatproof bowl over a pan of simmering water until glossy and soft with small pieces still visible.
- While warm, stir in your chosen carrier oil(s) and optional argan/rosehip oil until smooth.
- Chill the mixture in the fridge for 10-15 minutes, until edges are cloudy and thick.
- Whip the mixture with a hand mixer or whisk for 1-2 minutes until it turns pale and creamy.
- Add vitamin E and, if using, essential oils and whip briefly to combine.
- Spoon the cream into your clean jar, smooth the top, and label with the date. Let rest at room temperature until set.

3 comments
[…] See Why Everyone Loves This Recipe: Nourishing Shea Butter Face Moisturizer for Dry and Aging Skin […]
[…] View Full Instructions: Whipped Shea Butter Face Moisturizer […]
[…] View Full Instructions: Whipped Shea Butter Face Moisturizer […]