
whipped vanilla honey body butter recipe is the kind of cozy little DIY that saves my skin every time it gets dry, tight, and kind of cranky. If you have ever hopped out of the shower and immediately felt like you needed lotion right now, this is for you. I started making this because store bought “body butters” were either too greasy or they smelled like fake cupcakes in the worst way. This one is creamy, soft, and smells like warm vanilla with a tiny hint of honey. Plus, it uses shea butter, which my elbows and knees basically worship.
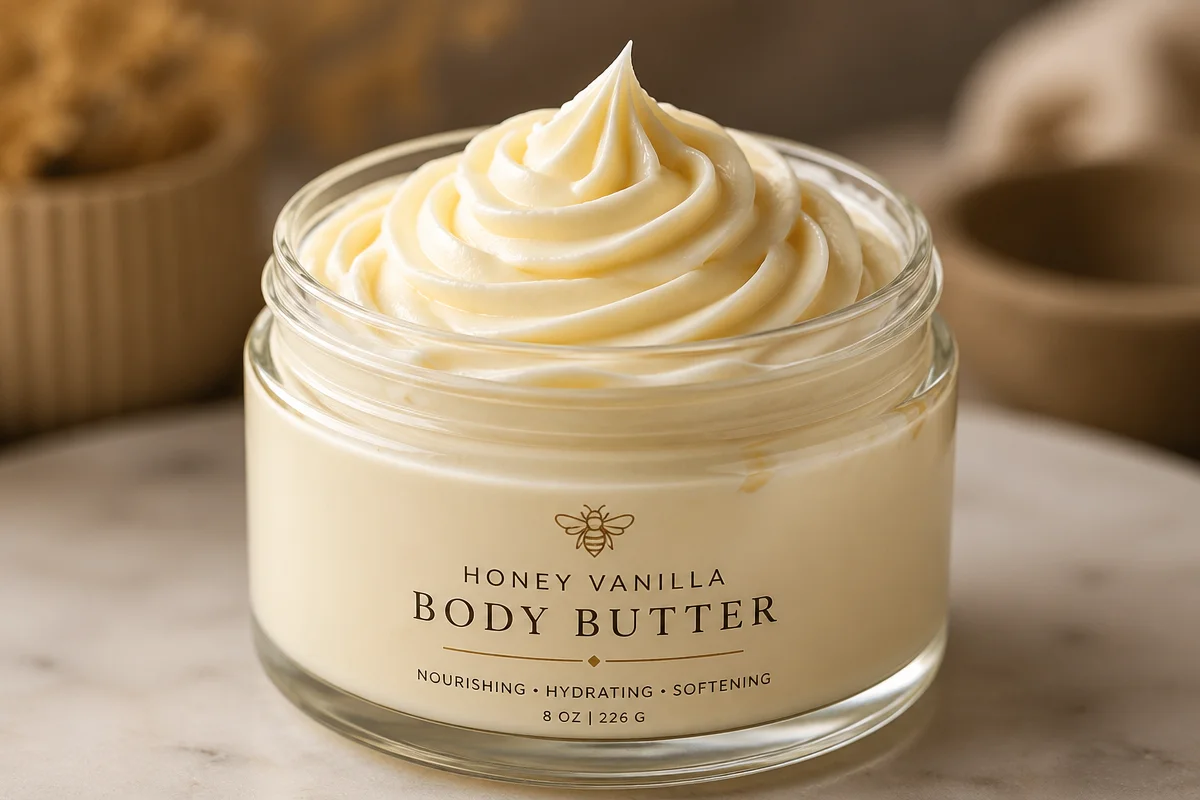
Table of Contents
Ingredient selection (the simple stuff that makes it feel fancy)
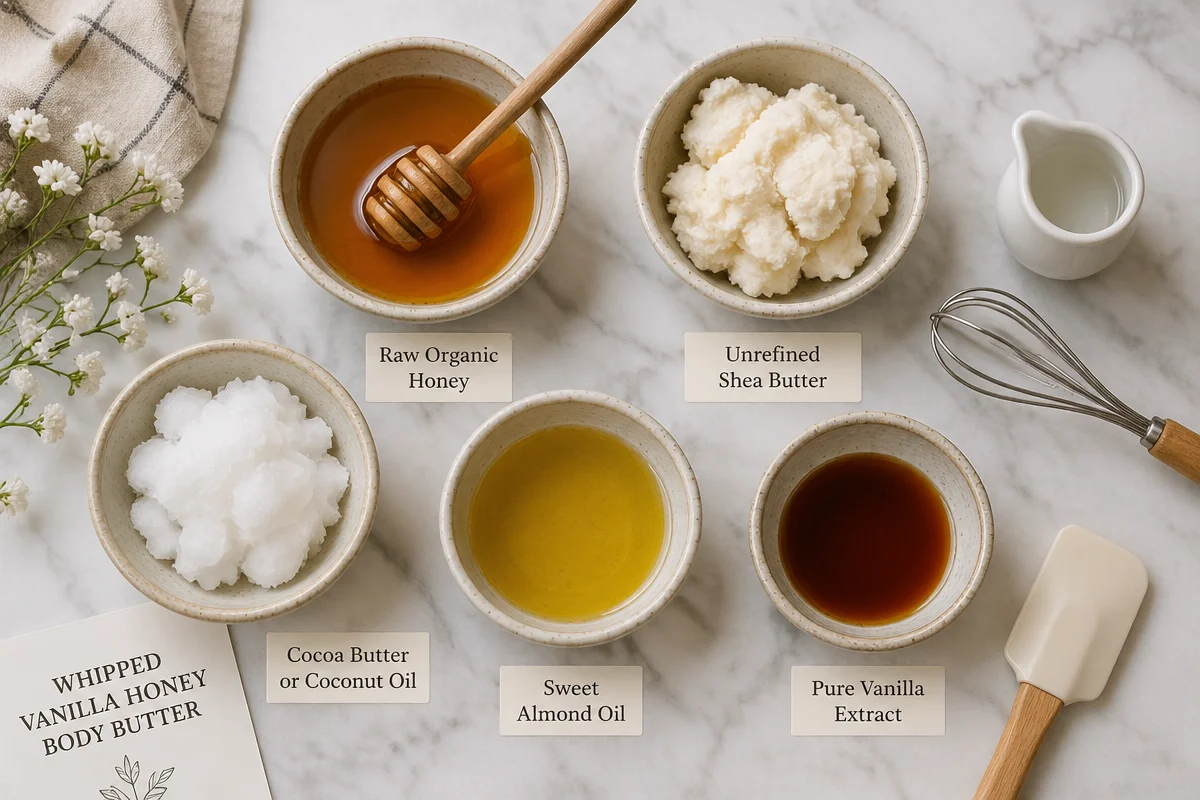
I keep this recipe pretty straightforward, but the ingredients matter a lot. Try to grab the best quality you can without stressing about it. If you want a bigger body care rabbit hole, I keep a running list of ideas over here: body care recipes and tips.
- Raw organic honey
- Shea butter (unrefined if you like that natural, nutty scent)
- Cocoa butter or coconut oil (your choice, depends on the feel you want)
- Sweet almond oil
- Pure vanilla (vanilla extract or vanilla oleoresin, more on that below)
A quick note on honey: I prefer raw because it feels more “alive” and fragrant. But if all you have is regular honey, it still works. I also like sweet almond oil because it absorbs nicely and does not feel heavy.
Why each ingredient matters (no chemistry degree required)
I used to think body butter was just melted oils whipped up, and honestly that is partly true. But each ingredient is doing a job, and that is why this turns into something you actually want to use.
Honey is the comfort ingredient
Honey is a humectant, which is a fancy word that basically means it helps pull moisture toward your skin. In a body butter, it adds a soft, cushiony feel. It can be a little sticky if you overdo it, so we keep the amount modest.
Shea butter gives that rich, “treated myself” feel
Shea butter is the base that makes this feel like true body butter instead of a thin lotion. It is especially good for dry patches like hands, feet, elbows, and knees. If you have ever wondered how body butter is supposed to be different than lotion, this guide is super helpful: what body butter is and why it works.
Almond oil helps it spread without feeling oily
Sweet almond oil softens the “solid butter” feeling so it glides on. It also helps the whipped vanilla honey body butter recipe sink in faster. If you hate that slippery layer that gets on your phone screen, almond oil helps reduce that vibe.
And vanilla? Vanilla is the whole mood. It makes the jar smell like a warm bakery moment, but in a clean way, not sugary perfume.
Equipment you will need (nothing complicated)
You do not need a lab setup. You just need clean tools and a little patience. I always wipe everything down and make sure it is fully dry because water droplets can mess with texture and storage.
Grab this:
- Double boiler (or a heat safe bowl over a pot of simmering water)
- Measuring cups and spoons or a small kitchen scale
- Mixing bowl
- Electric hand mixer or stand mixer
- Spatula
- Clean, dry jars with lids
For jars, I like glass because it feels cleaner and it is easy to sanitize. Plastic works too, just make sure it is meant for cosmetics and it is totally dry.
Recipe measurements (my go to ratio that actually whips well)
This batch makes about 1 medium jar, roughly 6 to 8 ounces depending on how much air you whip into it. If you want to scale it up, just keep the ratios similar.
Base butters:
Shea butter: 1/2 cup (about 110 g)
Cocoa butter OR coconut oil: 2 tablespoons (about 25 to 30 g)
Liquid oils:
Sweet almond oil: 3 tablespoons (about 40 g)
Honey and vanilla:
Raw honey: 1 teaspoon (start here, do not go wild)
Pure vanilla: 1/4 teaspoon, or about 10 to 15 drops if using a concentrated vanilla option
Optional: a pinch of vitamin E (like 1 capsule) for a little extra antioxidant support. Not required, but I add it when I have it.
Step by step method (this is where it turns into whipped magic)
This is the part where you want to go slow. Rushing is how you end up with grainy butter or soup texture. I have done both, so you do not have to.
- Melt the solids gently. Add shea butter and cocoa butter (or coconut oil) to your double boiler. Heat on low until just melted. Do not boil it.
- Remove from heat and add almond oil. Stir until smooth.
- Cool it safely. Let the bowl sit at room temp for 10 minutes, then pop it in the fridge for 15 to 25 minutes. You want it to look cloudy and slightly thick, not fully hard.
- Whip it. Use a mixer and whip for 3 to 5 minutes until it looks fluffy.
- Add honey and vanilla. Drizzle in the honey slowly while mixing. Add vanilla. Whip again for 1 to 2 minutes until it is creamy with soft peaks.
- Spoon into jars. Tap the jar lightly to settle air pockets, then lid it.
When it is done, it should look like frosting, but feel silkier. If you enjoy experimenting with different bases, you might also like this 3 ingredient body butter recipe for days when you want something super quick.
“I made this last weekend and my hands finally stopped looking ashy by day two. The vanilla scent is soft and not overpowering, and the texture stayed fluffy in the jar.”
Texture control (how to get it light in summer and cozy in winter)
Weather changes everything with body butter. If your house runs warm, your butter will feel softer. If your house is cold, it can turn dense. Here is how I adjust the whipped vanilla honey body butter recipe depending on the season.
For a lighter, summer consistency:
Use cocoa butter instead of coconut oil, and add an extra 1/2 tablespoon almond oil. Cocoa butter helps it stay stable, but still whips up nicely.
For a denser, winter consistency:
Use coconut oil and keep the almond oil at 3 tablespoons. It will feel richer and more protective, especially on feet.
If your body butter turned runny:
It happens. Scoop it back into a bowl, chill it until it is semi solid, then whip again. If it keeps melting, add 1 tablespoon more shea butter or cocoa butter next time.
If you want another texture style that is designed to feel lighter on the skin, this one is a good read: non greasy body butter recipe.
Storage tips (keep it fresh and avoid weirdness)
Since this has honey, the big thing is keeping water out. No wet fingers digging in after a shower. If you are worried about that, use a small spoon or cosmetic spatula.
My storage rules:
Use dry glass jars, label the date, and keep it away from direct sunlight and heat. A dresser drawer is perfect. If your bathroom gets steamy, store it somewhere drier and just bring it out when you need it.
Shelf life: I use mine within 2 to 3 months for best scent and texture. If anything smells off or looks separated in a way that will not remix, toss it and start fresh.
How I use it (when and where it works best)
I get the best results when I apply it right after a shower, while my skin is still slightly damp. You do not need a lot. Think: pea sized amount for hands, and maybe a grape sized amount for each leg.
Best areas for dry skin:
Hands, cuticles, elbows, knees, feet, and any patch that feels rough. I also rub a tiny bit on my shoulders if they feel tight after sun exposure.
The whipped vanilla honey body butter recipe is rich, so if you are putting on skinny jeans right after, use less than you think. Give it a minute to settle in and you will be good.
Common questions (the stuff everyone wonders about)
Why did the honey separate a little?
Honey can be stubborn. It helps to add it slowly while whipping, and make sure the mixture is not warm. If it separates, whip again after chilling for 10 minutes.
Will it feel sticky?
Not if you keep honey around 1 teaspoon per batch. If it feels sticky, you probably added too much or applied too much. Use a smaller amount and rub it in well.
How long does it last?
Usually 2 to 3 months if you keep it dry and clean. If you add vitamin E and store it cool, it can go a bit longer, but I still prefer making smaller batches more often.
Can I swap the fragrance?
Yes. You can use a skin safe essential oil, but go light. If you want to keep it cozy, lavender or sweet orange can be nice with honey. If you are sensitive, stick to vanilla only.
My shea butter got grainy. What happened?
That is usually from melting too hot or cooling too slowly. Melt gently, then chill until it is cloudy and thick before whipping. That one step makes a huge difference.
A sweet little final note before you whip a batch
If you try this whipped vanilla honey body butter recipe, keep it simple the first time, then tweak it once you know how it feels on your skin. The whole point is that you end up with something you actually enjoy using, not another jar sitting in a cabinet. And if you’d like even more natural hair care ideas, easy DIY tutorials, and beautiful visual inspiration, explore the full GlowNour Pinterest account here.
Whipped Vanilla Honey Body Butter
Materials
Base Butters
- 1/2 cup Shea butter Unrefined for a natural scent
- 2 tablespoons Cocoa butter or coconut oil Your choice, depends on desired feel
Liquid Oils
- 3 tablespoons Sweet almond oil Absorbs nicely, not heavy
Honey and Vanilla
- 1 teaspoon Raw honey Start with this amount
- 1/4 teaspoon Pure vanilla Or about 10-15 drops of concentrated vanilla
Optional Add-ins
- 1 capsule Vitamin E For extra antioxidant support
Instructions
Preparation
- Melt the solids gently. Add shea butter and cocoa butter (or coconut oil) to your double boiler. Heat on low until just melted, do not boil.
- Remove from heat and add almond oil. Stir until smooth.
- Cool it safely. Let the bowl sit at room temperature for 10 minutes, then pop it in the fridge for 15 to 25 minutes, until it looks cloudy and slightly thick.
- Whip it. Use a mixer and whip for 3 to 5 minutes until it looks fluffy.
- Add honey and vanilla. Drizzle in the honey slowly while mixing, then add vanilla. Whip again for 1 to 2 minutes until creamy with soft peaks.
- Spoon into jars. Tap the jar lightly to settle air pockets, then lid it.
