
non greasy whipped rose body butter recipe is basically my answer to that annoying moment when you moisturize and then your leggings stick to your knees, your phone slides out of your hand, and everything feels kind of slick. I still want rich moisture, just not the greasy film. This one is fluffy, light, and smells like a soft rose garden, not like a perfume counter. It sinks in fast but still leaves that healthy glow that makes your skin look well rested. If your skin gets dry after showers or you just want a pretty body care treat, you are going to love this.
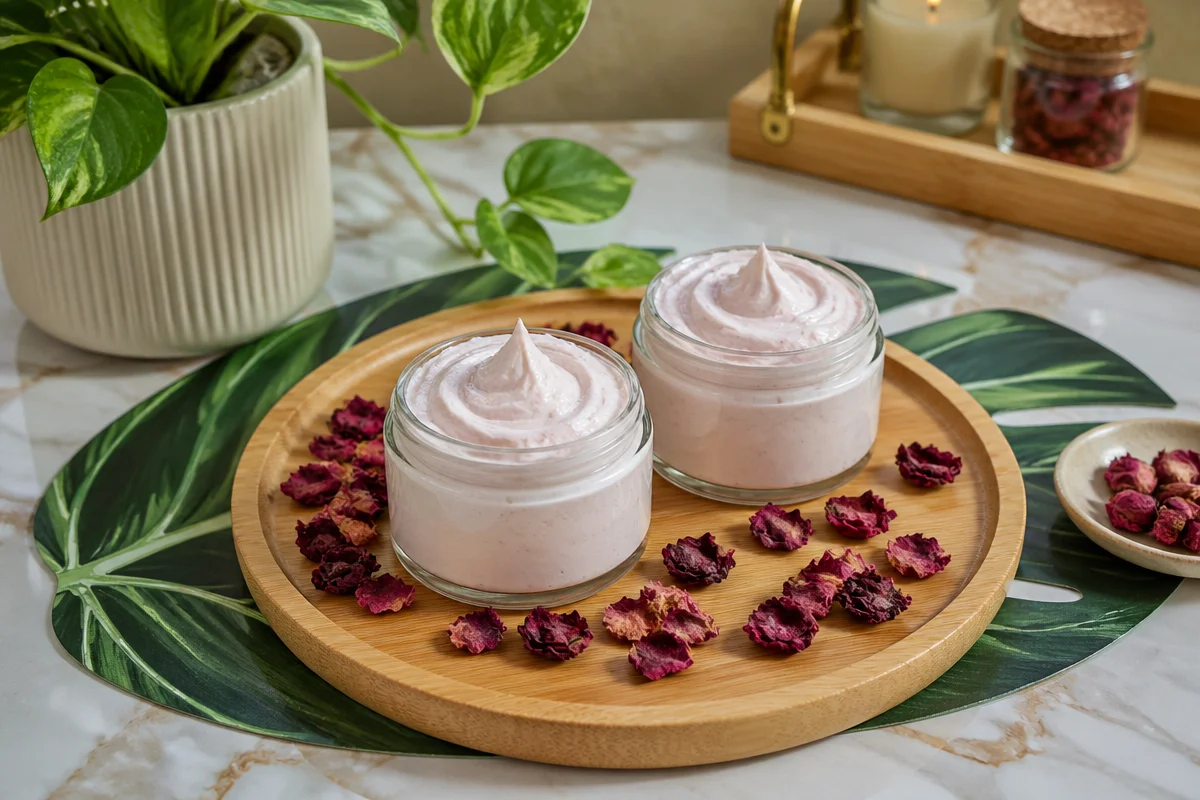
Table of Contents
Why this whipped rose body butter feels light but still makes skin glow
I used to think body butter always had to be heavy. But a few tweaks make a huge difference, especially when you whip air into it and add a little powder to cut the oily feel. The trick is balancing rich butters with lighter oils, then finishing with ingredients that help everything absorb better.
When I’m consistent with this (especially after nighttime showers), my skin looks brighter in the morning and feels smoother, like it got a drink of water. And if you like learning the basics, I really enjoyed reading this guide on what body butter is and how it works. It helped me understand why some recipes feel greasy and others do not.
Ingredients you need (and what each one actually does)
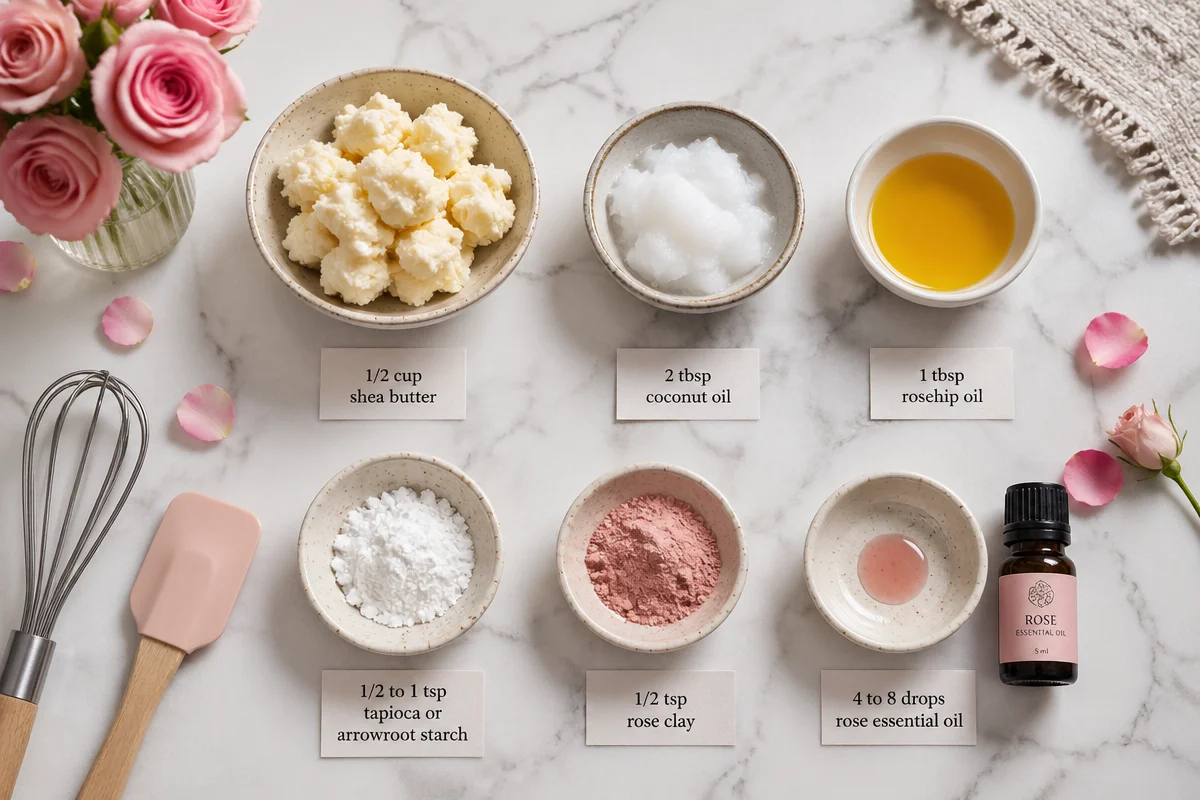
Let’s keep this simple and practical. Here’s what I use for my non greasy whipped rose body butter recipe, plus why it earns a spot in the bowl.
Ingredient roles, in plain language
- Shea butter: the main moisturizer. It gives that cushiony softness and helps with rough patches.
- Coconut oil: adds slip and helps the butter melt on contact. We keep it balanced so it does not feel oily.
- Rosehip oil: my favorite for a glow. It is lightweight and feels more like skincare than cooking oil.
- Rose essential oil: gives that real rosy scent. A little goes a long way.
- Rose clay: adds a soft tint and a silky glide. It also helps the finish feel less slick.
- Tapioca starch or arrowroot starch: the not greasy helper. It soaks up extra oiliness and helps it sink in faster.
If you are into super minimal recipes, you might also like this 3 ingredient body butter recipe. This rose one has a few more steps, but the finish is worth it.
Workspace and tools (quick setup so everything stays clean)
This is the part people skip, and then they wonder why their body butter looks a little grainy or goes off too fast. Clean tools make a difference because we are not using strong preservatives.
Here is what I pull out before I start:
- Double boiler (or a heat safe bowl over a pot of simmering water)
- Non metal mixing tools (silicone spatula and a silicone spoon are perfect)
- Hand mixer or stand mixer
- Measuring spoons and a kitchen scale if you have one
- Clean, dry jars with tight lids
- Paper towels and rubbing alcohol for wiping jar rims
One more tip from my own messy learning curve: keep water away from the mixture. Even a little splash can shorten shelf life.
The non greasy technique that makes it whip up airy
This is the heart of a non greasy whipped rose body butter recipe. It is not just what you use, it is how you cool it and when you whip it. If you melt too hot and whip too soon, it can turn soupy. If you wait too long, it can set hard and get chunky.
Here’s the method that works for me most times:
1) Melt gently. Low heat, slow melt. You want everything just melted, not sizzling hot.
2) Cool to the right texture. Let it cool until it looks a bit cloudy and thicker, like a thin pudding. I pop it in the fridge for short bursts and stir in between.
3) Add starch slowly. Sprinkle it in while mixing so you do not get little powder pockets.
4) Whip until it looks like frosting. Give it time. The air is what makes it feel fluffy and less heavy on skin.
If you want to compare techniques, this guide for a non greasy body butter recipe is also a great reference. I like seeing how small method changes affect texture.
Full recipe: my whipped rose body butter step by step
Ok, let’s make it. This batch size fills about one medium jar or two small ones, depending on how fluffy you whip it.
Ingredients (by volume, simple home style)
- 1/2 cup shea butter
- 2 tbsp coconut oil
- 1 tbsp rosehip oil
- 1/2 to 1 tsp tapioca or arrowroot starch (start small)
- 1/2 tsp rose clay (optional, but pretty)
- 4 to 8 drops rose essential oil (or to comfort level)
Directions
1) Set up your double boiler and add shea butter and coconut oil to the top bowl. Melt gently, stirring until just smooth.
2) Take it off the heat. Let it cool about 5 minutes, then stir in the rosehip oil. (I wait because I do not want to overheat the rosehip oil.)
3) Place the bowl in the fridge for 10 minutes, then check. Stir. Repeat in short rounds until it looks thicker and opaque, not fully hard.
4) Add rose clay and whip briefly to blend. Then sprinkle in starch slowly while whipping on low, then medium. Scrape the sides as needed.
5) Once it starts looking fluffy, add the rose essential oil. Whip again until it looks like whipped cream or frosting, usually 2 to 4 minutes.
6) Test the feel on your wrist. If it still feels too slick, whip in a tiny bit more starch, like 1/4 tsp at a time.
7) Spoon into clean jars. Tap the jar gently on the counter to remove air pockets, then close the lid.
“I tried this after my evening shower and I could actually put pajamas on right away. It smells soft and real, and my elbows look so much smoother.”
Troubleshooting (because real life batches do weird things)
Even when you do everything right, weather and ingredient brands can change the texture. Here’s how I fix the most common issues.
Too oily on the skin
Add a bit more starch, very slowly. Also make sure you are using a small amount on damp skin, not a big scoop on dry skin.
Too hard in the jar
Next time, reduce shea a little or add a touch more liquid oil. For this batch, let it warm at room temperature and re whip if needed.
It melted in the heat
This happens in hot months. Store it in the fridge and apply after showering. You can also whip in a little more shea to make it sturdier next batch.
Scent too strong
Whip in more unscented whipped butter (if you have extra) or remake and cut the essential oil by half. For sensitive skin, keep it very light.
Storage and shelf life (how to keep it fresh for months)
I treat homemade body butter like a fresh pantry item. It lasts, but it deserves decent storage.
My storage rules:
Keep it in an airtight jar, store in a cool dark place, and avoid getting water in the jar. In warm months, I like it in the fridge so it stays fluffy and does not slump.
Best use window: around six months if your tools were clean and you kept water out. If it ever smells off or changes drastically in texture, toss it and make a fresh batch.
How to use it for the best glow (without feeling coated)
This is where most people accidentally make any butter feel greasy. It is all about amount and timing.
After a shower, lightly pat your skin so it is still a little damp. Then take a tiny amount, like the size of a pea to start, and warm it between your palms. Massage into arms, legs, or anywhere you get dry. You can always add more, but it is hard to undo overapplying.
I love it on shins, elbows, and shoulders. If you want extra smoothness, use a gentle scrub first, then this butter right after.
Common questions (quick answers I wish I had at the start)
What are the best carrier oils if I do not have rosehip?
Jojoba is a great lightweight swap. Sweet almond oil also works, but it can feel a little richer. Keep the amount the same.
How do I keep it fluffy after I jar it?
Whip until it is fully airy, then jar right away. Store it cool. If it warms up too much and collapses, chill and re whip.
Can I skip the rose essential oil?
Yes. You can leave it unscented or use a skin safe fragrance oil made for body products. If you are sensitive, unscented is safest.
Is rose clay required?
Nope. It is mostly for that soft pink tint and a silky feel. The starch is the more important part for a less greasy finish.
Why does my shea butter sometimes feel grainy?
It usually happens when it cools too slowly or melts too hot. Gentle melting and quicker cooling in short fridge rounds helps a lot.
Ready to whip up your own jar?
If you make this non greasy whipped rose body butter recipe once, you will get why I keep a jar around year round. It is rich without feeling heavy, and the rose makes it feel like a little self care moment after a long day. If you want another rose skincare idea for your routine, this DIY non greasy rose face cream for dark spots is a nice companion piece. And if you’d like even more natural hair care ideas, easy DIY tutorials, and beautiful visual inspiration, explore the full GlowNour Pinterest account here. Make your jar, start with a small amount, and give it a week of regular use. Your skin will tell you everything you need to know.
Whipped Rose Body Butter
Materials
Main ingredients
- 1/2 cup shea butter Main moisturizer for cushiony softness
- 2 tbsp coconut oil Adds slip for easy application
- 1 tbsp rosehip oil Lightweight oil for a glowing finish
- 1/2 to 1 tsp tapioca starch or arrowroot starch Helps absorb excess oil
- 1/2 tsp rose clay Optional for color and texture
- 4 to 8 drops rose essential oil For a fragrant rose scent
Instructions
Preparation
- Set up your double boiler and add shea butter and coconut oil to the top bowl. Melt gently, stirring until just smooth.
- Take it off the heat. Let it cool about 5 minutes, then stir in the rosehip oil.
- Place the bowl in the fridge for 10 minutes, then check. Stir and repeat until it looks cloudier and thicker.
- Add rose clay and whip briefly to blend. Then sprinkle in starch slowly while whipping on low, then medium.
- Once it starts looking fluffy, add the rose essential oil. Whip again until it looks like whipped cream or frosting, usually 2 to 4 minutes.
- Test the feel on your wrist. If it feels too slick, whip in a tiny bit more starch, like 1/4 tsp at a time.
- Spoon into clean jars, tap gently on the counter to remove air pockets, then close the lid.
