
DIY Apple Pie Body Butter is my little fix for those days when my skin feels dry and boring, and I just want something cozy that smells like comfort. If you love the warm apple pie vibe, this one is going to make you ridiculously happy. It feels rich, it melts in fast, and it leaves that soft, bakery like scent behind without being overpowering. I started making this when I realized store bought body butters were either too perfumey or not moisturizing enough. Plus, it is honestly fun to whip up, like making frosting, but for your skin. 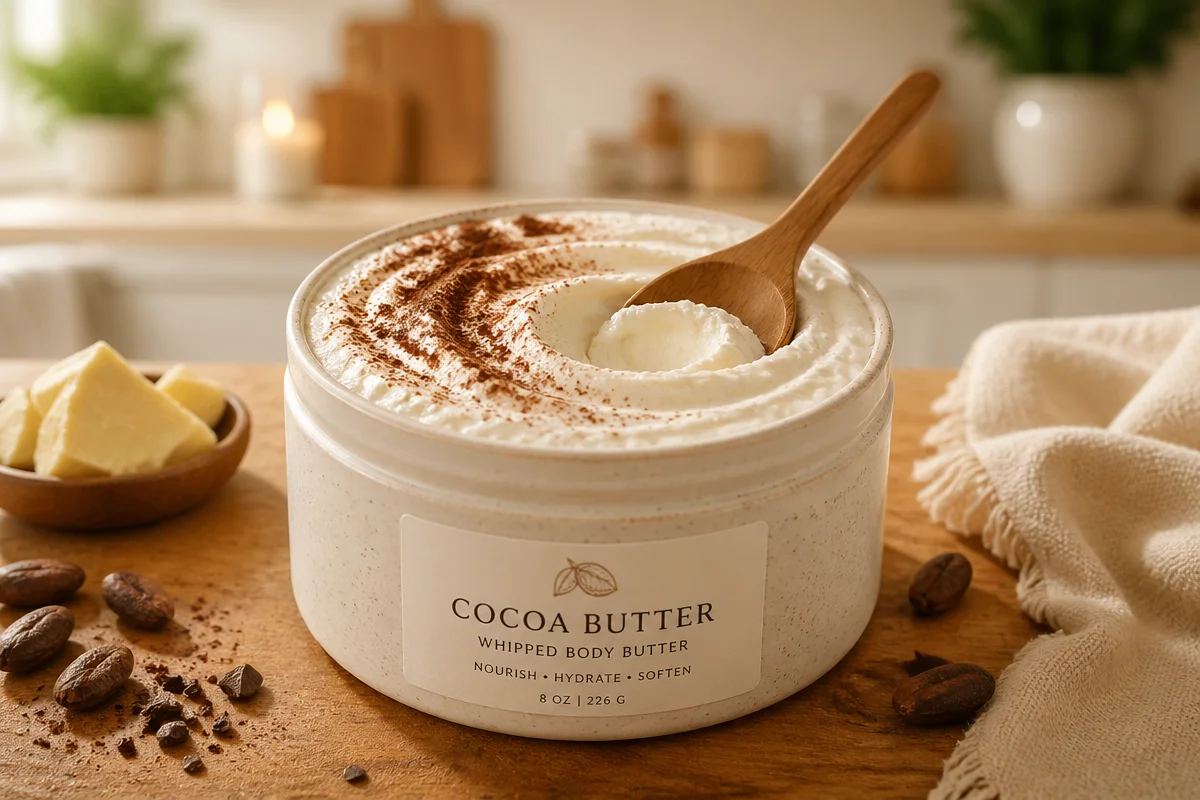
Table of Contents
Preparing Your Ingredients: essential oils and fragrances
The scent is what makes this feel like a treat, so I like to plan it first. The goal is a warm apple pie smell, which usually means a mix of apple, cinnamon, vanilla, and something buttery. For DIY Apple Pie Body Butter, you can go two routes: skin safe fragrance oils made for body products, or essential oils with a softer, more natural vibe.
If you are using essential oils, keep it simple. Apple is tricky because there is not a common true apple essential oil, so many people use a fragrance oil for the apple note and then essential oils for the spice note.
My easy scent plan:
Use an apple fragrance oil that is labeled skin safe, then add a tiny amount of cinnamon scent using either cinnamon fragrance or a very cautious amount of cinnamon essential oil. Cinnamon can be irritating, so I treat it like hot sauce. A little goes a long way.
Quick safety tips I actually follow:
- Check the label for skin safe usage rate on any fragrance oil.
- If you have sensitive skin, skip cinnamon essential oil and use a gentle cinnamon fragrance instead.
- Do a patch test on your inner arm before using it all over.
- Avoid using on broken or freshly shaved skin until you know how it feels.
For a softer bakery smell, I also like adding a drop or two of vanilla fragrance oil if you have it. It rounds everything out so it smells less like a craft store and more like actual pie cooling on the counter.
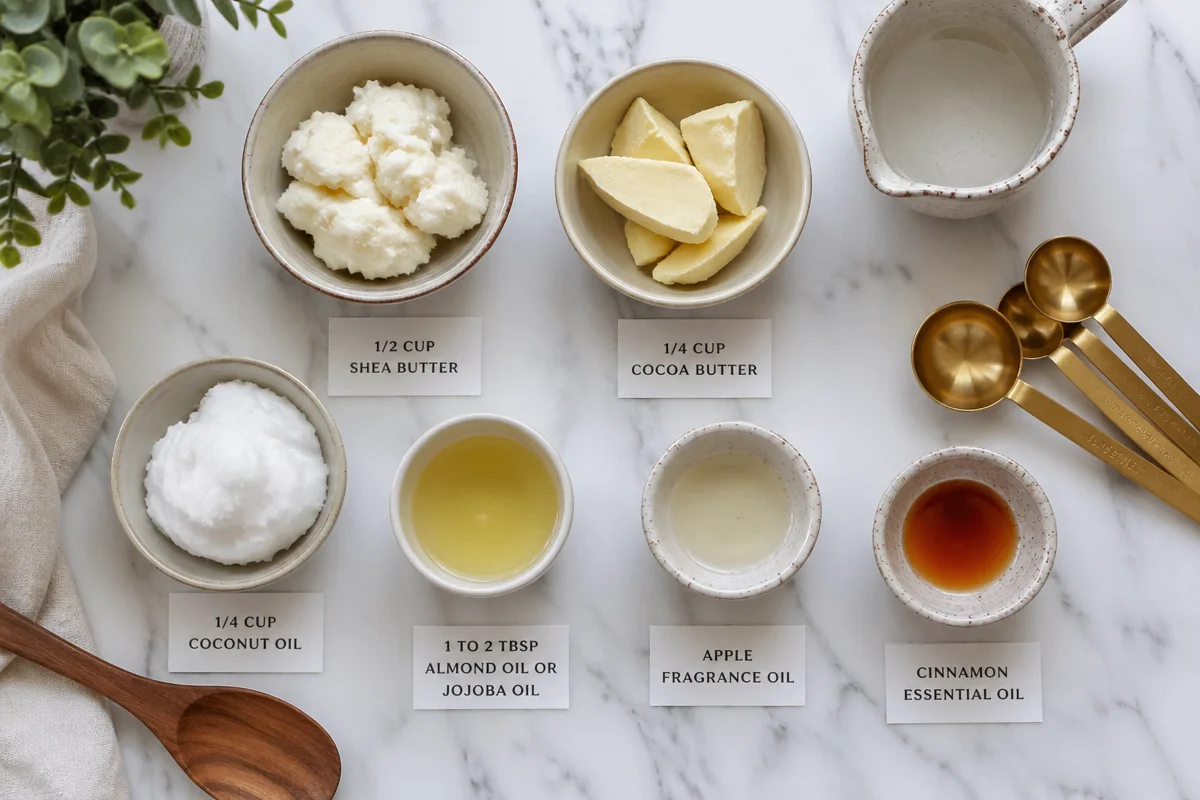
Natural butters and oils and additional supplies
This is the part where it starts feeling like a kitchen project, because we are basically blending butters like we are making dessert. The butters give you that thick, creamy texture, and the oils help it glide and absorb without feeling waxy.
What you will need for the mixture:
Shea butter and cocoa butter are the stars. Coconut oil makes it silky and easier to whip. Then I add a lighter oil like almond or jojoba to keep it from feeling too heavy. If you hate greasy lotion, do not skip the lighter oil, it really helps.
Additional supplies I recommend:
You do not need fancy equipment, but a couple of basics make it smoother and less messy.
- A heat safe bowl or glass measuring cup
- A small pot for a simple double boiler setup
- A spoon or silicone spatula
- A hand mixer or stand mixer for whipping
- Clean jars with lids, preferably airtight
- Paper towels and rubbing alcohol to wipe tools and jars
I always wipe down my jars and tools with a bit of rubbing alcohol and let them dry. Since this is an anhydrous product, meaning no water added, it is less likely to grow funky stuff, but clean tools still matter. It is the easiest way to keep your DIY Apple Pie Body Butter fresh longer.
Base Ingredients: shea butter, coconut oil, cocoa butter, almond oil or jojoba oil
Here is the base that works every time for me. It gives you a whipped body butter that feels rich but not like you dipped your arms into cooking grease. You can adjust the texture later, but this is a very beginner friendly starting point.
Simple base recipe:
- 1/2 cup shea butter
- 1/4 cup cocoa butter
- 1/4 cup coconut oil
- 1 to 2 tablespoons almond oil or jojoba oil
- Apple fragrance oil plus a small amount of cinnamon fragrance or essential oil, following safe usage rates
- Optional: a little vanilla fragrance oil for that bakery warmth
Shea butter is your deep moisturizer. Cocoa butter is firmer and gives that velvety, protective feel. Coconut oil helps it melt into skin quickly. Almond oil feels soft and comforting, while jojoba oil is amazing if your skin is picky, because it is closer to what your skin already likes.
One thing I learned the hard way: cocoa butter smell can be strong on its own. I personally love it because it leans into the dessert vibe, but if you want more apple and less chocolate, choose a deodorized cocoa butter or use slightly less of it.
Crafting Your Apple Pie Body Butter: melting and mixing, cooling and whipping, packaging and storage
This is where it gets fun. The first time I made this, I kept peeking into the bowl like it was going to magically turn into whipped cream on its own. It will not. But once you whip it, it gets fluffy and gorgeous, and you will want to dip a finger in. Do not. Save that energy for when it is done.
Melting and mixing
Add the shea butter, cocoa butter, and coconut oil to your heat safe bowl. Set it over a pot with a little simmering water. Keep the heat low. You want everything melted, not cooked.
Stir occasionally until smooth, then remove from heat. Let it cool for a minute or two, then stir in your almond oil or jojoba oil.
Cooling and whipping
Now you need it to cool until it looks a bit cloudy around the edges and thicker, like a soft balm. I usually place the bowl in the fridge and check every 10 minutes. When it is thick but still mixable, it is ready.
Whip with a hand mixer for a few minutes. It will lighten in color and get fluffy. If it still looks runny, chill a little longer and whip again. This back and forth is totally normal.
Once it is fluffy, add your fragrance. Start small, mix, then smell. I know it is tempting to keep adding, but too much fragrance can irritate skin and can also make the final scent feel harsh.
Packaging and storage
Spoon the whipped butter into clean jars. Tap the jar on the counter a couple of times to settle air pockets, then close the lid.
I made this for my sister and she texted me two days later saying it smelled like fresh cinnamon apples and made her elbows feel baby smooth. She said she kept opening the jar just to sniff it.
And yes, that is exactly the kind of reaction you want. DIY Apple Pie Body Butter should feel like a small comfort you can keep by the sink or your nightstand.
Storage basics that actually matter:
Storage: airtight containers, label with date, cool dry place, 6-12 months. Heat can make it soften or melt, so if your bathroom gets steamy, store it in a cooler spot. If it melts and re hardens, it is still usable, it just may lose some fluffiness. I also try to keep wet fingers out of the jar. Use a small spoon or scoop if you can.
If you want it even more stable in warm weather, you can use a little less coconut oil and a touch more cocoa butter. That makes it firmer and less likely to turn into soup in summer.
Common Questions
Can I use this DIY Apple Pie Body Butter on my face?
I would not, especially if you are acne prone. Cocoa butter and coconut oil can feel heavy on facial skin. I keep it for body only, like hands, arms, legs, and elbows.
What if I do not have almond oil or jojoba oil?
You can use grapeseed oil or sunflower oil if you have them. Just pick a light oil that does not feel super greasy. Avoid kitchen oils that go rancid fast.
Why did my body butter turn grainy?
That usually happens when shea butter cools too slowly or melts and cools in weird cycles. Try melting gently, then chilling faster, then whipping. It is still safe to use, but the texture is less silky.
How strong should the cinnamon be?
Soft and cozy, not spicy. Cinnamon is the fastest way to turn a pleasant scent into irritation, so keep it low. You can always add a tiny bit more next batch.
Can I make it without fragrance oils?
Yes. You can make a gentle version using just a tiny amount of skin safe essential oil like sweet orange plus a very small touch of cinnamon leaf, or skip cinnamon entirely. It will not smell exactly like pie, but it will still feel amazing.
A cozy little jar you will actually use up
Once you make DIY Apple Pie Body Butter, it is hard to go back to boring lotion. You get that whipped, buttery texture, plus the warm cinnamon apple smell that makes getting moisturized feel like a treat. Keep your tools clean, go easy on the fragrance, and store it in an airtight jar in a cool dry place. If you try it, tweak the scent until it feels like your perfect idea of apple pie. And seriously, make an extra jar, because someone in your house will want to steal it.
DIY Apple Pie Body Butter
Materials
Base Ingredients
- 1/2 cup shea butter Deep moisturizer
- 1/4 cup cocoa butter Adds firmness and protective feel
- 1/4 cup coconut oil Helps it melt into the skin quickly
- 1 to 2 tablespoons almond oil or jojoba oil Keeps it from feeling too heavy
- to taste drops apple fragrance oil Skin safe for scent
- to taste drops cinnamon fragrance or essential oil Use carefully as it can irritate
- optional drops vanilla fragrance oil For a warmer bakery scent
Equipment
- 1 unit heat safe bowl or glass measuring cup For melting ingredients
- 1 unit small pot For a double boiler setup
- 1 unit spoon or silicone spatula For mixing
- 1 unit hand mixer or stand mixer For whipping the butter
- 1 unit clean jars with lids For storage
Instructions
Melting and Mixing
- Add the shea butter, cocoa butter, and coconut oil to your heat safe bowl. Set it over a pot with a little simmering water. Keep the heat low. Stir occasionally until smooth, then remove from heat.
- Let it cool for a minute, then stir in your almond oil or jojoba oil.
Cooling and Whipping
- Let the mixture cool until it looks a bit cloudy around the edges and thicker, like a soft balm.
- Whip with a hand mixer for a few minutes until it looks fluffy and light in color. If it still looks runny, chill for a little longer and whip again.
Packing and Storage
- Spoon the whipped butter into clean jars, tap the jar on the counter to settle air pockets, and close the lid.
